The Princess Castle Cake – A Birthday Wish
- 03
- January
- 2018
I remember it like it was yesterday: Waking up early in the morning and rushing to the hospital! And…within few minutes (forty agonizing minutes to be precise) I would meet the person who would change my life forever. And, in a blink of a second…today is the day! Yes, today is my little girl’s fourth birthday. How is it even possible?
Every day with you (not just your birthday) is a celebration of the day you came into our lives. And, to just show the importance of the day, I had something in my mind! A surprise cake party at home!
A certain little princess theme was always going on for some time…So, coming up with the idea was pretty instant! However, to hold it as a surprise was a big deal! As she kept asking all about her birthday cake and party for more than 973 times in a row – every single day! Which really motivated me to bake.
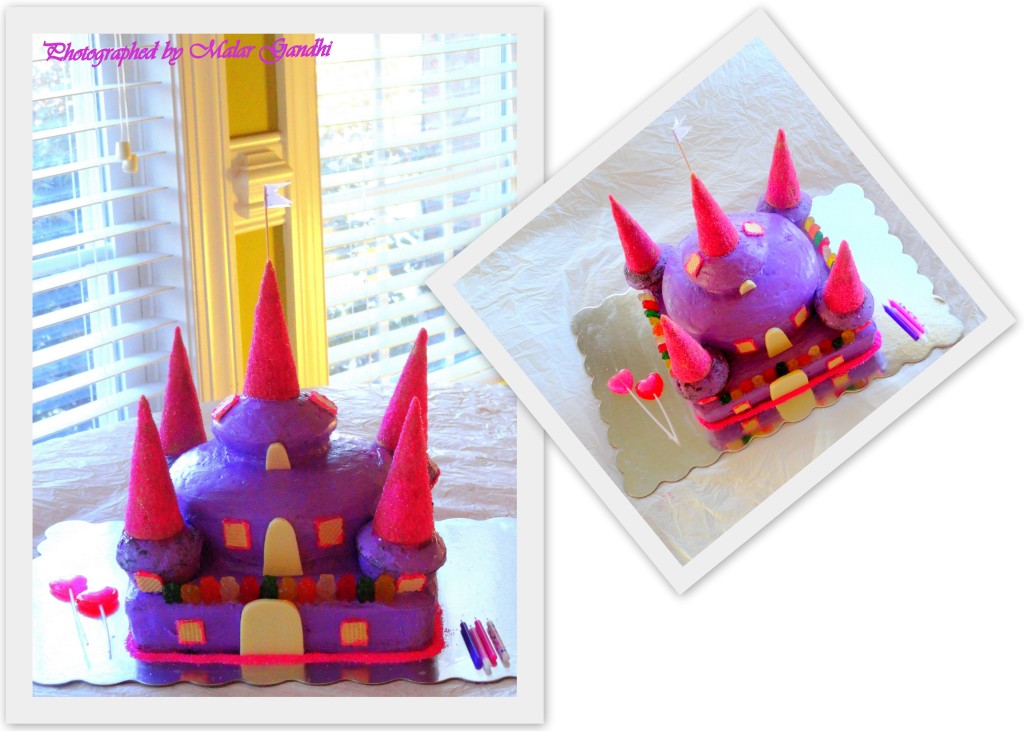
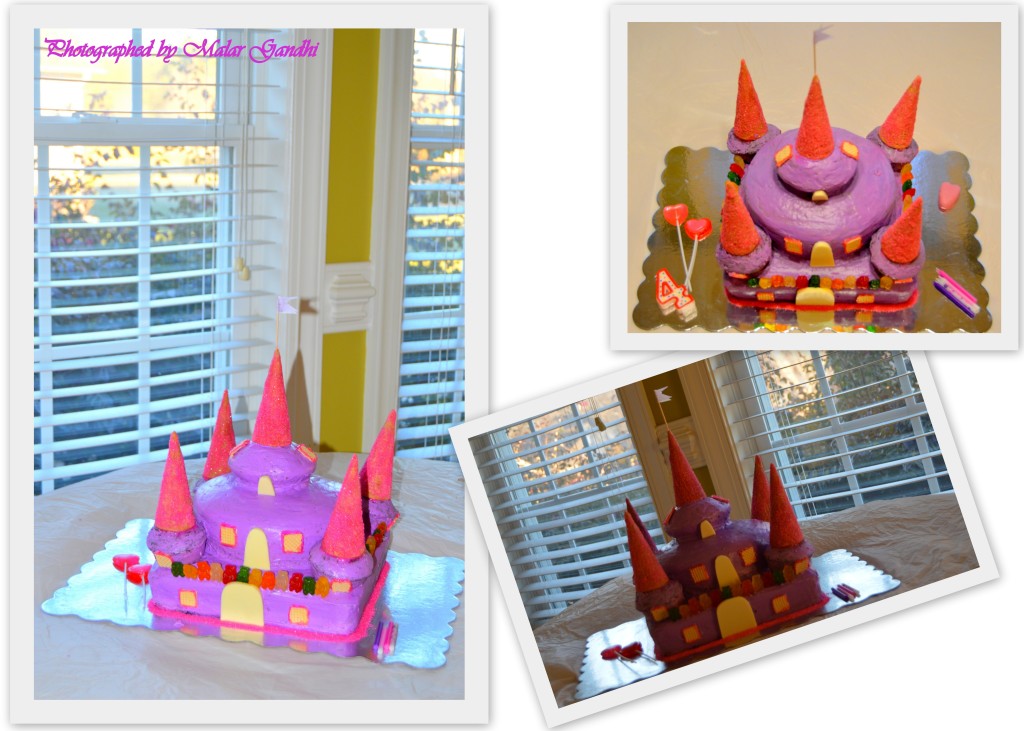
Well, to begin with today’s post…we all have seen those incredible Frozen Princess Cakes floating around on the internet. Of course, its all way too stunning and beyond my skill level. However, I was pretty determined to hold up the theme and the very idea. Yep…A Simple Princess Castle Cake…with Purple and Pink hue it is( Yeah…I know, its way too gaudy! Damn, what can I do? The little one raves about these colors!)
For some time…I kept mounting the empty cake trays in secret! I tell you…to get a perfect tower in your imagination is much more easier than on a kitchen table. Oh yeah, mounting – a round cake over a rectangle one…square one over a round…round over a square…square over a square! The attempts to were quite tasking! Hey…remember the time, we did those sand castles at the beach. Its the adult version of it. ![]() We get creative on the go. Yes, the end result was fabulous! So…here you go, my take on the Princess Castle Cake.
We get creative on the go. Yes, the end result was fabulous! So…here you go, my take on the Princess Castle Cake. ![]()
Oh Yes, my little girl took the celebration to next level. She was super-surprised…super-excited. The cake was a Mega Hit. ![]()
![]()
 The Making Of Princess Castle Cake
- One Large Square Cake
- One Medium Round Cake
- One Tiny Round Cake
- Four Large Cupcakes
- Purple or Pink Frosting
- Sugar Cone – 5
- White or Brown Chocolates – Doors
- Wafers – Windows
- Pink Icing Gel – For Finishing Touches
- Gummy Bears or Candies – for the Parapet wall
- Chocolate Syrup – to coat the cones.
- Pink Sugars – for the Border plus to dust the cones
- Tooth picks and color papers for the flag
I didn’t follow any rule…my attempt is all about baking her favorite cake. So, I used chocolate cakes, here today. However, if you decide to use any white cake…its gonna be beautiful. As the frosting is kind of a dark shade here…it would bring the color up.
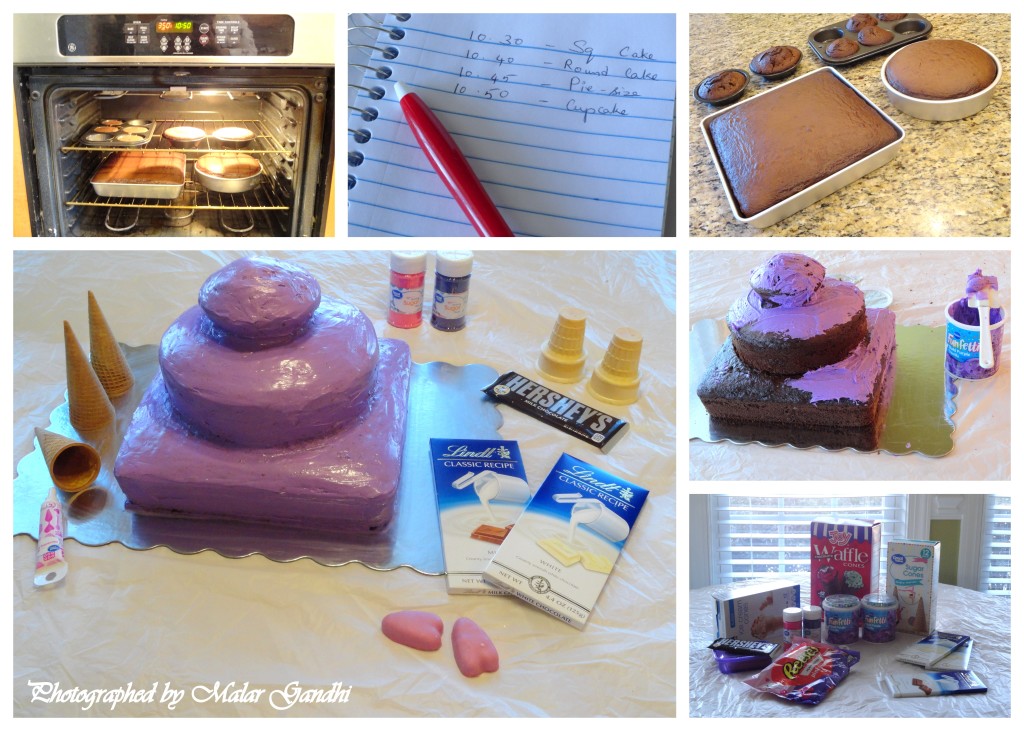
I baked all the cakes at one go. Yes, A large square, medium round cake, couple of small round cakes and four large cupcakes. I timed it perfectly 10 minutes apart to pop it in the oven! I used the lower rack for the large cakes and used the upper rack in the oven for small ones! This was easy in one way than baking it several times, you know! Honestly…it was bit scary to imagine that all the cakes going for a toss at once! Eeeek. Just in case…if you’re not sure about the temperatures. Go for one cake at a time (to be safe).
Make a pretty strong base cake…as its gonna hold the tower in shape. I used a large square cake! Make sure, that you get an uniform thickness cake. I hate to chisel the cake In my opinion, chiseling would demand more frosting! For the person who uses…so minimal sugars (like me), its okay to bake several small sized cakes for the tower.
So, done…the baking? Now, you won’t need much of the frosting / icing as you imagine. Yeah…I just covered the whole tower with one single color. However, you could alternate the each layer with different hues for better results.
I covered the sugar cones (ice cream cones) with melted chocolate (you can also use chocolate syrup for that matter) and sprinkled some pink sugars on it. For the parapet wall…I used her favorite gummy bears. Its very optional…I tell you…once the tower is all done, you could get creative on the go.
I trimmed couple of dark and white chocolates for the doors and windows. However, to my dark major purple thing (cake, I mean)…white chocolate doors were bit more appropriate! I have used pink-strawberry wafers for the windows! And, I finished the edges with pink gel – to cover the window trims!
I didn’t use much of the sprinkles, today. Kind of happy with the basics…so the colored sugars (here pink) was pretty fine to finish the nuances touches…like border and stuff. And, finally stick the flag! Voila. ![]()
Recipes
Recent Posts
- Saturday Special – Saathvik Meals
- Kebab – Taking only one bite at a time!
- Coin Parotta – Small Things Matter
- Bonda – Rainy Day’s Snack
- Chappathi Making Board & Rolling Pin – Matters!
Recent Comments
- MahiArun on Idichakka Thoran – Kerala Special
- veena on Idichakka Thoran – Kerala Special
- M.P.Gandhi on Idichakka Thoran – Kerala Special
- M.P.Gandhi on Banana Milkshake – Wholesome Meal
- Manjula on Banana Milkshake – Wholesome Meal


